Node.js: A Todo App with Express
So last time we installed Node & did the traditional "Hello World" example with Node & then using the Express framework. Today we're going to make a simple app using Express from the beginning. We will generate the app with Express & then explore Express further, including Unit testing. This will most likely be a multi-part tutorial. The app we're building is a very simple "To Do" application. I know it's boring, but it's simple enough that we can focus on Express & Node rather than the implementation of the app.
The first thing to do is install Express globally:
npm install express -g
I am presuming here basic knowledge of Node, NPM & Express. If you're not familiar, you might be best off reading my tutorial from last week before continuing.
Installing Express globally will give us the express command in our command line & we can use this to generate our new app:
express new JSPlaygroundToDo
You should see something like this: → express new JSPlaygroundToDo create : JSPlaygroundToDo create : JSPlaygroundToDo/package.json create : JSPlaygroundToDo/app.js create : JSPlaygroundToDo/public create : JSPlaygroundToDo/public/javascripts create : JSPlaygroundToDo/public/images create : JSPlaygroundToDo/public/stylesheets create : JSPlaygroundToDo/public/stylesheets/style.css create : JSPlaygroundToDo/routes create : JSPlaygroundToDo/routes/index.js create : JSPlaygroundToDo/views create : JSPlaygroundToDo/views/layout.jade create : JSPlaygroundToDo/views/index.jade dont forget to install dependencies: $ cd JSPlaygroundToDo && npm install
Express has set up the basic skeleton of our application for us. Lets make sure we've got all the dependencies, so cd into the folder & run npm install. This will check every package in package.json is indeed installed.
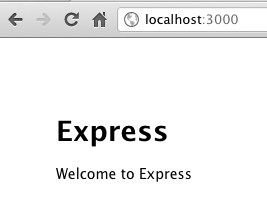
Once that's done, lets just run it & see what we have. In the command line type node app.js to run the app, and then head to http://localhost:3000. You should, if everything's working, see this:
One thing that confused me here is that many tutorials say that running npm start should run your server, but for me it didn't. This is because NPM looks for a file named server.js, and ours is called app.js. There's two choices here:
- Rename
app.jstoserver.js. - Tell NPM to look for
app.js.
Either is fine, I'm going to do the latter. Bear in mind if you rename to server.js, from now on in this tutorial where I refer to app.js, you need to use server.js. To do this, add this to package.json:
, "scripts" : { "start": "node app.js" }
You will notice there the random comma at the start of that snippet. By default NPM structures its package.json file like that, to avoid you missing out commas:
{ "name": "application-name" , "version": "0.0.1" , "private": true , "dependencies": { "express": "2.5.8" , "jade": ">= 0.0.1" } , "scripts" : { "start": "node app.js" } }
Whilst I'm not a fan personally, I'll happily abide by it when working with Express. As I mentioned last time, if your JSON file is broken, you wont get any errors, it just wont work, so be careful when editing it.
Now, running npm start does indeed work:
→ npm start
> application-name@0.0.1 start /Users/JackFranklin/Dropbox/Sites/JSPlaygroundToDo > node app.js
By default, Express uses the Jade templating engine. This is a bit odd at first, but actually I grew to like Jade quickly. In future tutorials I'll show you how to change from Jade if you'd rather, but for now we'll stick with it. Head to views/index.jade to see our index page: h1= title p Welcome to #{title} h1= title just says that we should create a new h1 element and put within it the contents of title, which is a variable we set when the template is called.
p Welcome to #{title} creates a new paragraph and sets the text, where #{title} will be replaced with whatever we call the variable. So, lets see how we render a view. In app.js, you will see:
app.get('/', routes.index);
So, when a GET request is fired to /, it calls the method routes.index, which is defined in routes/index.js:
exports.index = function(req, res){ res.render('index', { title: 'Express' }) };
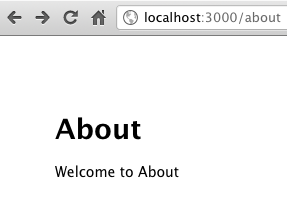
So you can see here all this function does is render the index view, setting the title variable to "Express". Lets see how we might create an about page, at the url /about. Head over to routes/index.js and add in:
exports.about = function(req, res){ res.render('index', { title: 'About' }) };
Here I'm still rendering the index view but passing in a title of About. Then, within app.js:
app.get('/about', routes.about);
You may be wondering how app.js knows about routes.about when we defined this as exports.about in our routes file. This is because right at the top of app.js we have: var express = require('express') , routes = require('./routes');
You can see here we set the variable routes to the result of loading in the routes folder. Then, within routes/index.js, when we define exports.about, routes gets set to the value of exports.
So, quit & start the server, and head to http://localhost:3000/about. You will see:
 .
.
You might notice there we had to restart the server for these changes to take affect. This gets very annoying, very quickly. Having to stop & start the Node server whenever we make a single change is not what I want to be doing. Thankfully, others thought this too and there are solutions to stop us having to do this. One such person who thought this is Remy Sharp, who made nodemon to do this for us. Install it with npm install nodemon -g and then launch the server again with:
nodemon app.js 3000
You'll see everything now works. However, now head into routes/index.js and change anything. You will see in your terminal this output:
29 Apr 18:37:47 - [nodemon] restarting due to changes... 29 Apr 18:37:47 - [nodemon] /Users/JackFranklin/Dropbox/Sites/JSPlaygroundToDo/routes/index.js 29 Apr 18:37:47 - [nodemon] starting node app.js 3000 Express server listening on port 3000 in development mode
You see what just happened here? Nodemon detected a file change & restarted our server for us. Easy. I'll be using nodemon from now on to start our server, although the times we have to do it manually will be far less now, thanks to nodemon.
One thing that bugs me is that the routes file is called index.js. You might think differently, but for me that suggests that index.js deals just with the index route. I prefer mine to be called routes.js. If you'd like to do the same, rename routes/index.js to routes/routes.js:
→ mv routes/index.js routes/routes.js
Then in app.js, change the require() call to:
routes = require('./routes/routes');
And run the server again. You should see it all working, nothing should have changed. Feel free to change the routes file to whatever you like. In the future we will explore how to have multiple route files, if you prefer to set your app up like this.
To wrap this up, I want to talk briefly about Jade. You may have realised our template was very bare, we just have a h1 and p right now. There's actually another template file, views/layout.jade which defines our general template:
!!! html head title= title link(rel='stylesheet', href='/stylesheets/style.css') body!= body
The first line creates a Doctype, however the doctype it produces is an xHTML doctype. I prefer to use the HTML 5 doctype, which we can do just by replacing !!! with doctype5. Note that Jade files are compiled on request, so they do not require a server restart.
The next line creates the html tag. Instead of having opening & closing tags, we indent in to show the structure of our template. The other lines are fairly obvious. The most important line is:
body!= body
When you call render on a view, the contents of that view are placed into layout.jade as the body variable. != is used here to tell Jade not to escape the contents of the body variable. By default Jade will use =, which tells it to escape the variable, but as we're passing in HTML to the body variable, we don't want Jade to escape it.
With that I think it's time to call it a day. If you'd like to check out the code, it's on Github. Next time we will actually make steps towards making our Todo application and talk about unit testing in Node.